Wednesday, March 30, 2005

Relax

After the footings pour, I feel a bit mentally exhausted, so I have "switched-off" for a day or two. Over Easter we installed a boundary fence on the site, with the help of my in-laws. I'll write about that later...

Its Full!


Here is a close-up of a level-marker in the trench. When pumping concrete, these are monitored closely so that manual shovelling of concrete is not required. Its worth setting these up properly to reduced any errors during the pour.

Finished Footings


Here is the finished footings job. Note the chalk marks that show the location of height-markers for the concrete pour (nails embedded in the side wall of the footing, and sprayed with bright marker paint). Where a step down is required in the footing, this is marked with a double chalk line.

Electrical Power for Building


I decided not to have a builders power pole, but instead put the money towards installing the permanent 240V supply at the time the footings were done (a so-called "temporary-permanent supply"). Here the underground supply comes from a pit in the street to the footing in the bottom right-hand corner. I also arranged for a telephone conduit, and an auxilliary conduit (e.g. garden lights) to be placed in the same trench. These conduits are installed with a draw-wire only. Note the timber board to stop the concrete from migrating out of the footing into the trench for the conduits while it cures (although the conduit trech was backfilled soon after the concrete pour). A steel pole placed into the footing during the pour will eventually support a meter box, and accept the 240V cabling.

Bay Window Footing


This is the most complex area of the strip footing, where there is a bay window, with a verandah that follows the shape of the bay. The excavator found this time consuming to excavate.

Getting Level


Here we see a laser level being used to determine the relative levels on the site (also called reduced levels). The excavation for the footings is underway in the background.

Monday, March 28, 2005

Getting Ready for the Footings Pour

This turned out to be a big event, and while evrerything went well, I later realised the extent of co-ordination required. We spent one day excavating and preparing the footing for the house, including the cutting of steel trench-mesh. The next day, the footing for the garage was done in the morning, with the pour timed for 1:00 in the afternoon.

There were six trades that need to be organised for the day of the pour:
- steel trench mesh delivery (at 7:30)
- excavator
- carpenter/builder (levels & mesh & trench clean-out)
- building surveyor to verify footings
- concrete pumping crew
- concrete supply

The concrete pumping crew turned up late at 2:30, but otherwise it went as planned.

I had calculated 44 lengths of steel mesh for the trenches (6m per length). At overlaps, you have to allow for an extra 1 meter of mesh, as the overlap must extend over 0.5m or more. In the end we used 45 lengths. The mesh for the garage was not deformed (smooth, unknurled) which the surveyor was skeptical of, but he passed it any ay (the house mesh was deformed bar, with knurling for additional grip to the concrete). Apparently some imported mesh is not deformed -- the building surveyor said that he had discussed it with a structural engineer who said it would be OK, but it would be better if it was deformed (knurled).

Friday, March 18, 2005

Pouring Piers


This is Russell (our excavator) pouring the concrete into a 600mm diameter pier. The small piers (450 diameter) fill up pretty quickly, and tended to over-fill --- so its out with the shovel to move the excess into the next hole! All piers were filled to 600mm below the ground line, top allow for a 500mm deep beam to be poured over the top (in the next stage of work). Fortunately, none of the fill around the piers collapsed, even with the concrete truck being very close at times.

Footings: Pier Locations


Here is a portion of our floor-plan, showing the location and size of the piers which will support the footing-beam over the fill-section of the site

Wednesday, March 16, 2005

Concreters Like Round Piers

The initial pier & beam footing design from my Structural Engineer requires that sections of the strip footing are deepened down to "Extremely Weathered Rock", with minimum 200kPa bearing capacity. The design would work, but its not so easy to build.

My footings contractor would prefer round piers. The advantages are:

* There is up to 700mm of fresh fill to excavate through. Fresh fill readily collapses, especially with long trenches. So round holes are much better, as any attempt to collapse inwards, tends to be self-correcting, as the fill is trying to fall in on itself. The piers are drill first, inspected by the building surveyor, and then filled with concrete to just below the bottom edge of the beam (which is poured later)

* The deep pier holes is easily cleaned with the auguer (no need for a person to get down into a narrow deep tench to clean it out)

So, I have had the original pier & beam design re-done with round piers.

Building Set Out

Last Friday, the building set-out was completed. This means that the site has many, many pegs on it now. For each wall-section there are two pegs, with a nail in the top, marking the external line of brickwork. To make this useful for the excavation of footings, string-lines are run between pegs, and the ground marked with the paint or chalk beneath the string line.

Thursday, March 10, 2005

Ordering Bricks

For some months now, we have had a "nominal order" of bricks on the books with our brick supplier. I have today, placed an order for the bricks to cover the base-brickwork (the bricks between footing and the damp-course). While I worked out the quantity pretty accurately, I have over-ordered slightly, as any bricks remaining can be used later on the top-brickwork. Bricks come in packs of 272-per-pack. I have allowed a three week delivery delay for this order.

Brickies, Brickies, Brickies....

I have decided on the brickie we will use, after discussing the job with three possibilities. The base prices varied from A$800 to A$1100 per 1000 laid (+GST). We have taken the middle quote, and that brickie also comes with good references from a source we trust. On top of this, he told me that he "batches" his mortar (i.e. measures the mix with buckets/boxes to get consistancy). Batching is often not done, but it should be.

Turn Trees into Wood Chips

It really hurts me that we had to remove a couple of good trees during the excavation. If we could have moved them, we would have. Anyway, the accpeted method of discarding these is to chip them. In my case the excavator removed the trees, and piled them up at the bottom of the block. It turns out this might not have been the best approach, as most excvators don't care how dirty the trees get once they are on the ground -- but the tree-chippers do care, as the dirt blunts the machinery they use. Anyway, today the trees are being chipped. We contemplated keeping some chips for a future garden, but decided against it.

Trade Prices

Because I will be buying a lot of building materials over the next few months, I have applied for an account with a large building supplier that will entitle me to "trade prices" on materials. This was easy to do, and should save some money. The company required some credit references in the building trade, so I quoted my window supplier and truss supplier.

Wednesday, March 09, 2005

Telecom Services

I forgot to say that while the trench for the site power is open (600mm deep), it is a good idea to put any other stuff into the same trench (provided its OK with regulations). For example, put in another conduit, spaced 150mm above the power conduit, with phone or other services/cables (e.g. low-voltage garden lighting). It would be wise to leave a "pull through cord" in that conduit, so that other cables could be installed after the trench is covered.

West Elevation


Here is the west elevation of the house we are building, as seen from the street. The funny ground-line in-front of the garage shows there is a down-hill run to drive into the garage.

Site Power for Building

Electrical power to the site is normally done with a "builders power pole", and an aerial service line. Being a 1-acre site, the aerial service gets a bit long, and the cost of the power pole is quite high (approaching A$700 or so for 4 months).

A good alternative is arrange "temporary/permanent" power. We need underground supply anyway (the limit is 20 meters boundary set-back, and we exceed this), so we are going to have a conduit/cable installed from the underground pit in the street to our garage. This must be done before the footing is poured, as the counduit comes up through the footing - so I have to co-ordinate the electrician to be on-site with the footings excavator. (In our case that's the same contractor as the site-prepartion contractor). Of course, I'll be on-site for this as well.

The conduit must come up through the footing exactly where the inside surface of the garage wall is (well...within 10mm I suppose), but this should be OK, as the site will have been set-out before doing the footings.

A temporary meter box is then connected to the conduit/cable coming out of the ground, with outlets for powering builder tolls/equipment. Later, once the brickwork is done, this supply becomes the permanent supply to the house.

North Elevation


Here is the "north elevation" of the house we are building. This is the side of the house not seen from the street (which is to the right of the image). The two rooms with gables are lounge and family room. (And in case you hadn't realised it, a "North Elevation" is always a view looking "South"!)

Footings & Engineers

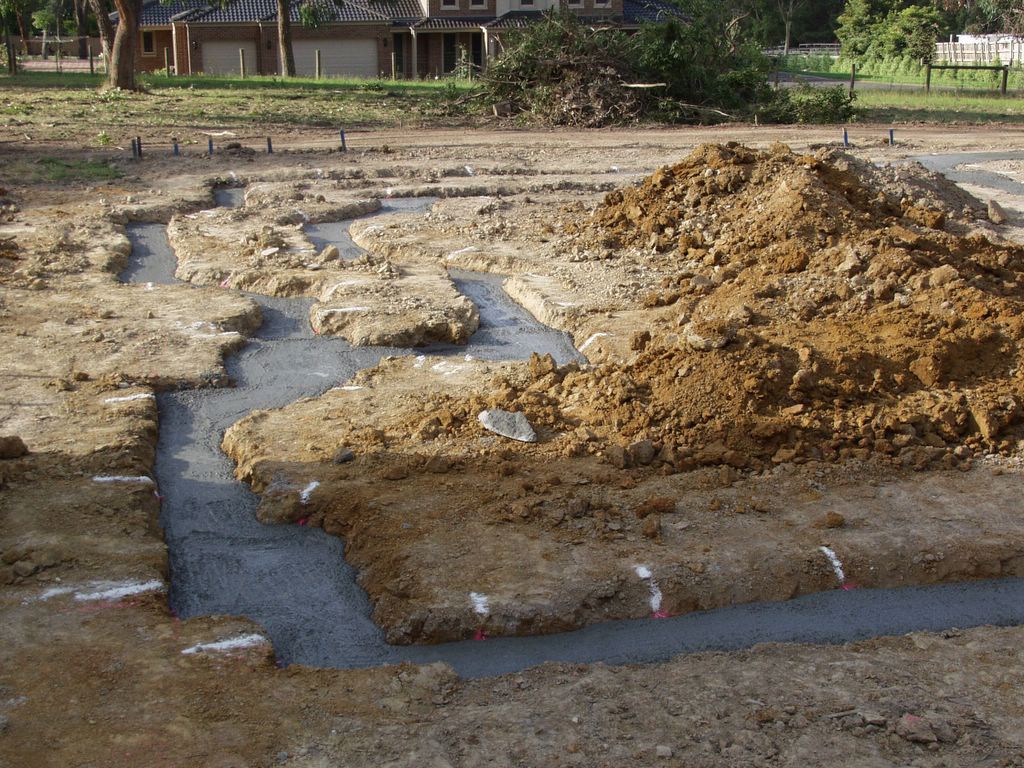
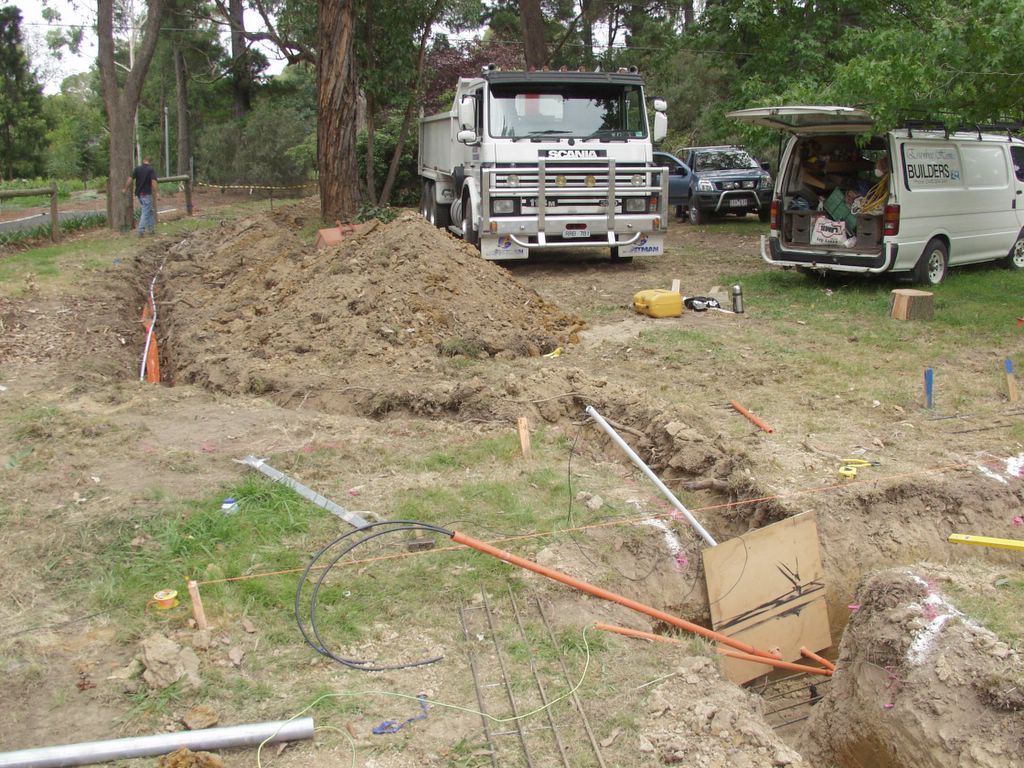
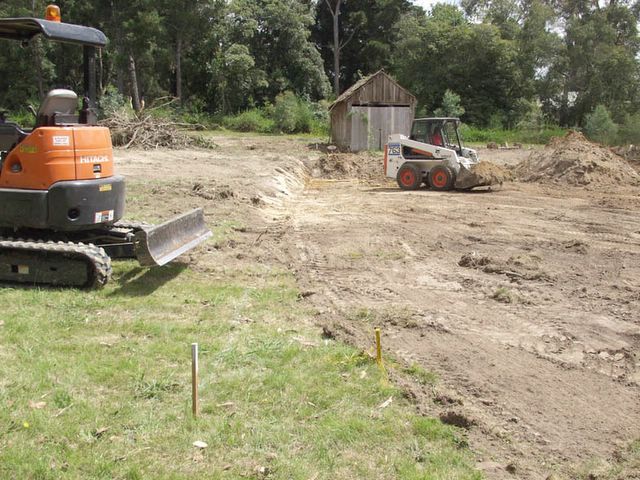
With the site preparation completed, the next step is to excavate trenches down to the founding soil -- the "foundations". The trenches are later filled with steel re-inforced concrete, and these are called the "footings".

The house is brick-veneer construction, so the trenches for footings follow the perimeter walls, including any masonry for the terraces and chimneys. For the house, the trenches are 300 x 600. For the garage, the trenches are min. 600 x 400, since the engaged-brick-pier wall constrcution is considered to be "full masonry" and requires greater stability in the footing, as the masonry is carrying roof load (unlike the house, where the frame takes the roof load).

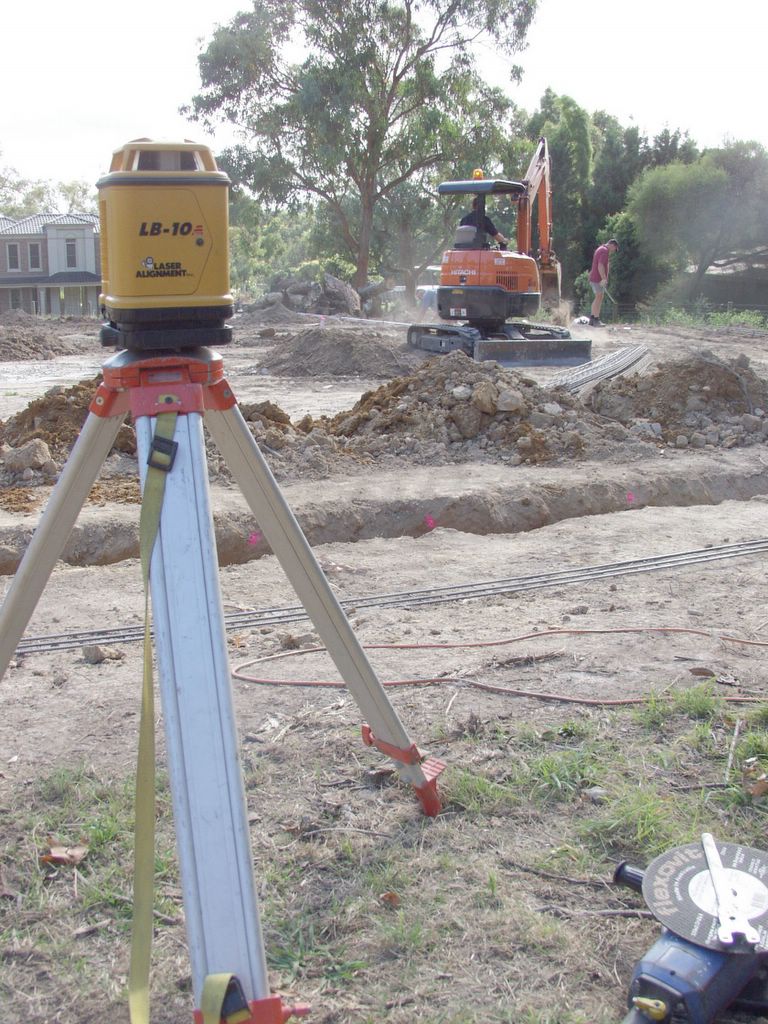
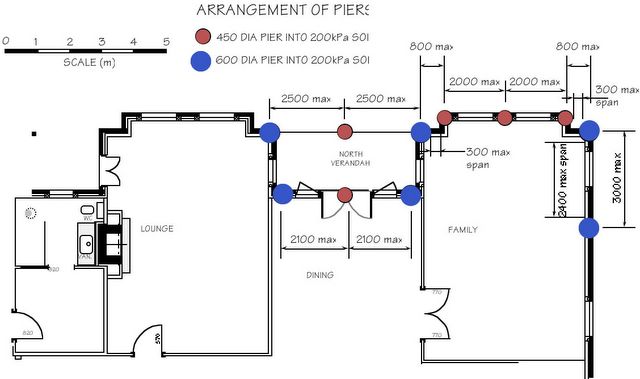
A portion of our house footing is now located in ground with 700mm of fill (resulting from levelling the site). We could just dig down to around 1300mm and use more concrete to get a stable footing. But as most contractors charge per cubic meter of concrete, is will be cheaper to install a pier & beam footing here. (Piers of about 600 diameter, space about 3000mm, are drilled down to good clay, and filled with concrete/steel, then the beam section is poured on top, going down to only 600mm and not necessarily into "good ground". This must be engineer designed (whereas the standard footing design is taken from Australian Standard AS2870). I have engaged a structural engineer to design this during this week.

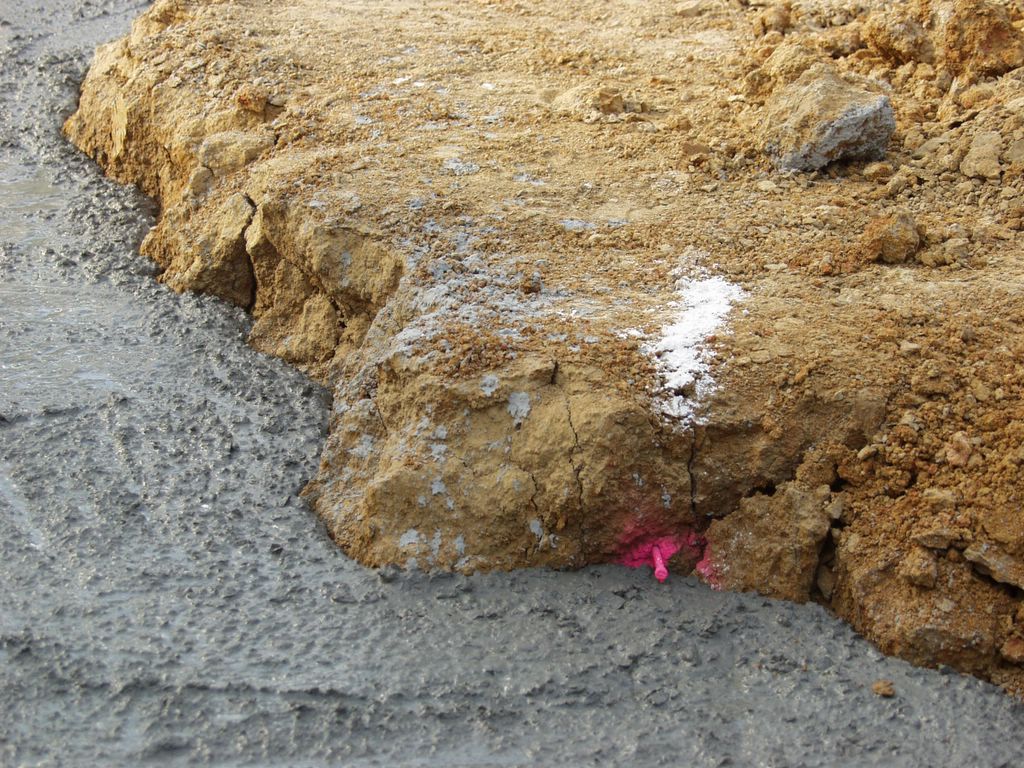
PS: "Good ground" in terms of the code means soil that can support a load of 100kPa, or 100kN per sq metre (the weight of a 100kg person, spread over a square 100mm x 100mm).

Monday, March 07, 2005


Here is the excavation work in progress. The cut is only about 750mm deep, and will have a shallow batter on it (slope 1 in 3). The timber garage has been left as a place to take smoko when its raining, and to store cement etc. Excavation pegs can be seen in the foreground.